Building NodeJS on OS X 10.5.8
The Compleat ATtiny13 LED Flasher: Part 3 - Low Power Mode
This is the final part of three in attempting to explain how to make the ATtiny13 flash a LED.
Part 2: Using timer interrupts
Part 3: Low power mode
In previous posts we’ve looked at creating a simple LED flasher circuit for the ATtiny, a first-pass program for the ATtiny using delays, and a second-pass implementation exploiting timer overflows resulting in a simpler program. In this article I will explore the power saving modes on the ATtiny13 as an example of how to minimize the power consumption of your circuit. If your ATTtiny13-, ATtiny80-, or even ATmega-based circuit relies on battery power you will be able to significantly improve the battery life by using the chips’ power saving modes.
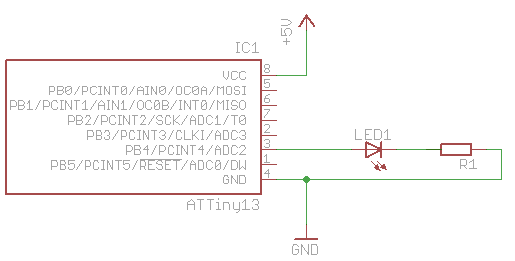
In this article we will be using the same circuit developed in the previous posts:
The Compleat ATtiny13 LED Flasher: Part 2 - Using Timer Interrupts
This is the second part of three in attempting to explain how to make the ATtiny13 flash a LED.
Part 2: Using timer interrupts
Part 3: Low power mode
Post-Pre-script: If you find this post useful, happen to try out the code, or have any other views or criticisms, please leave a comment. I’d love to hear what you think.
– Ian
So last time around, we made a LED flash. Of course there are other, more elegant ways to do it. In this post I’ll explore interrupts, and specifically the timer overflow interrupt. For this I’ll use the same circuit setup from the first article. If you’re reading this one independently, here’s a circuit diagram:
The Compleat ATtiny13 LED Flasher: Part 1 - Setup, Hardware and a Basic Solution
This is the first part of three in attempting to explain how to make the ATtiny13 flash a LED.
Part 1: Setup, Hardware and A Basic Solution
Part 2: Using Timer Interrupts
Part 3: Low Power Mode
If you’re used to the user-friendliness of Arduino, getting started with bare bones AVRs can be hard work. I’d like to try to go slowly through the early steps and point out some of the information sources I used.
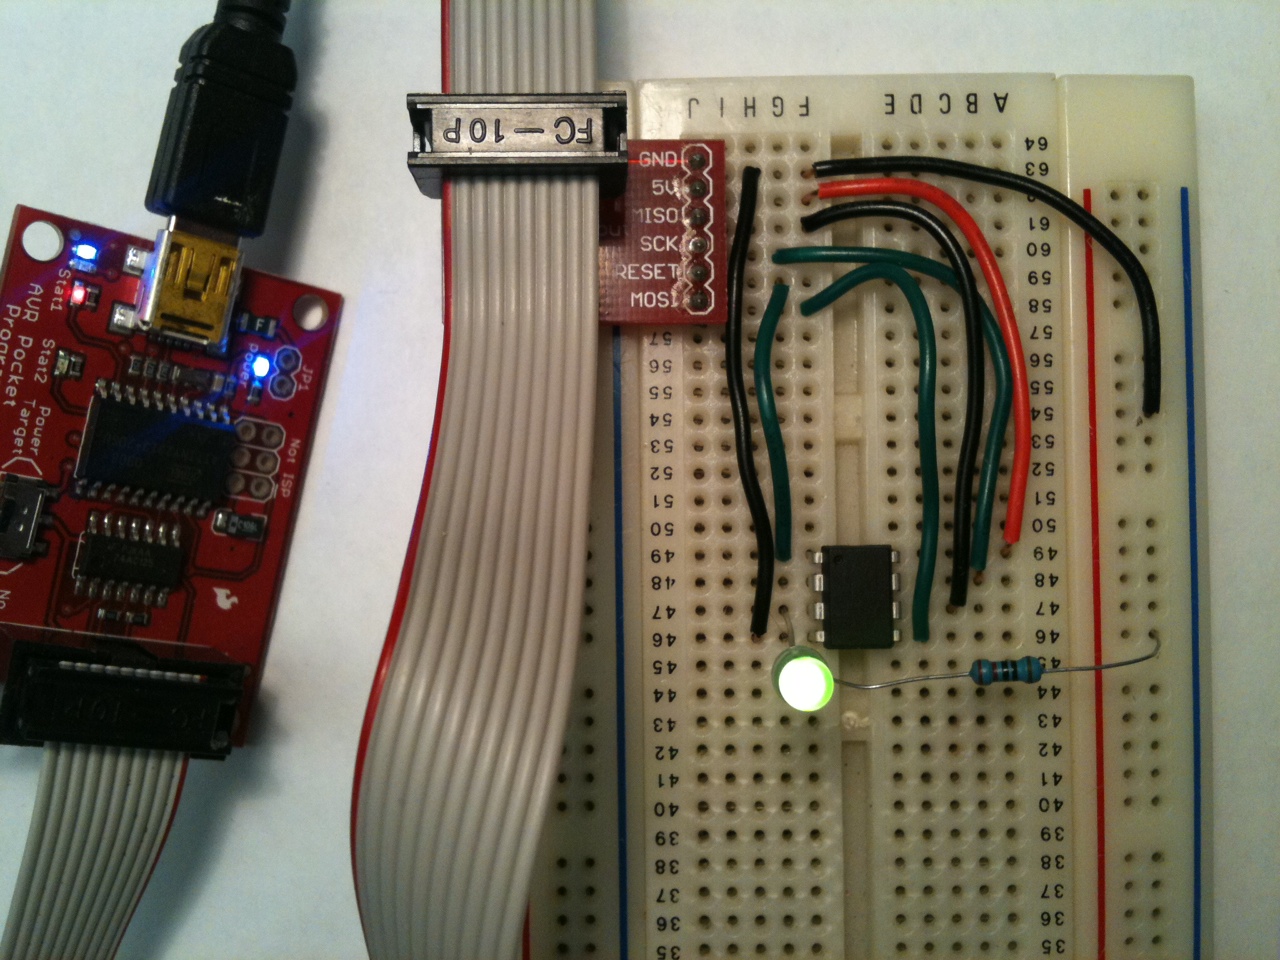
First, start at the end: here’s the final circuit. It has an ATtiny13, an LED and current-limiting resistor, a few wires, the programmer interface, and that’s about it. All it does is flash the LED on and off (very much like the classic 555 timer astable multivibrator but with the advantage of no passive components required). That’s it. Not much to it.
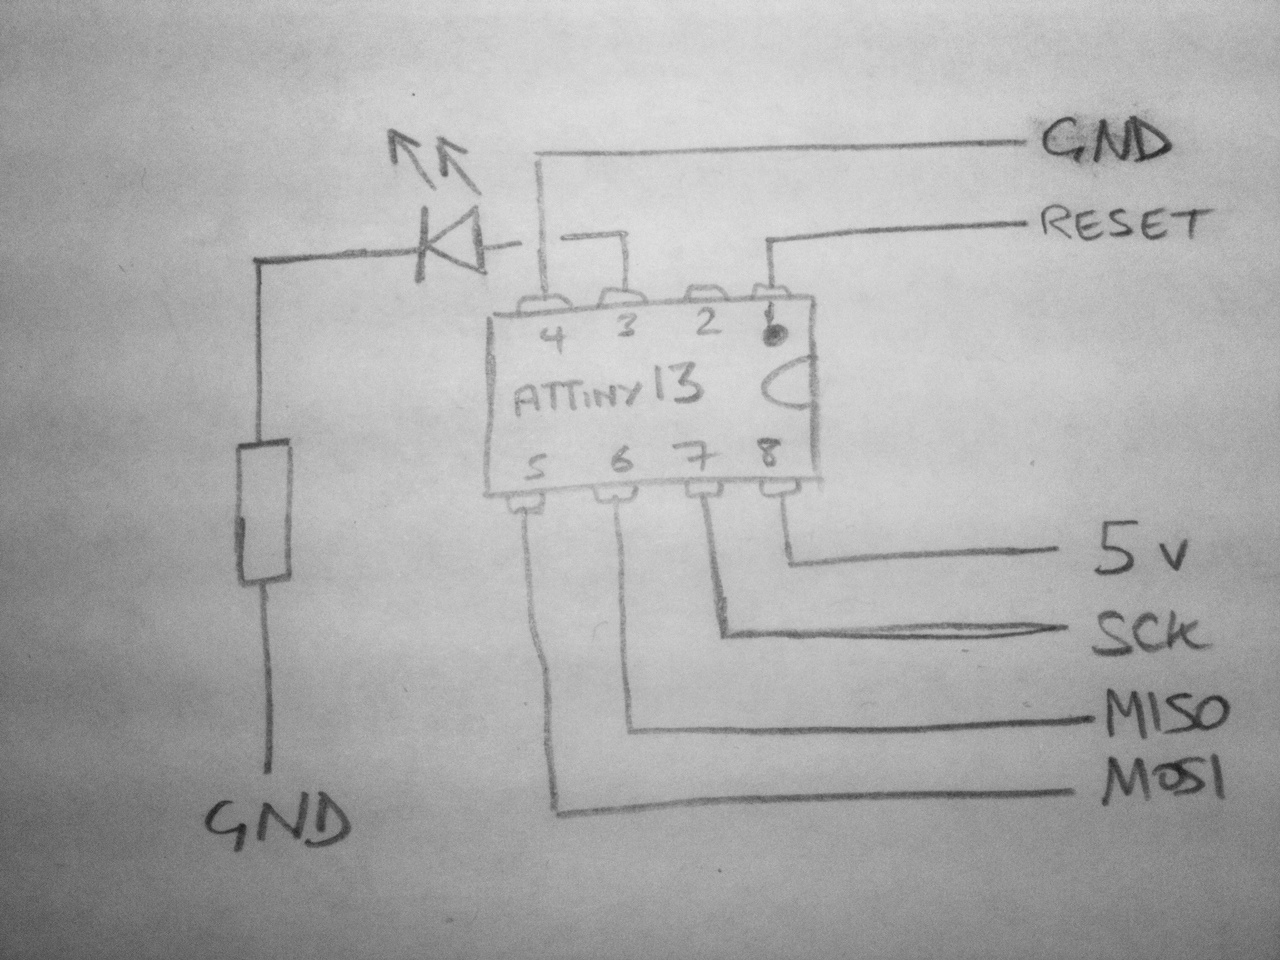 Also, here’s a quick sketch of a circuit diagram too – the inputs all come directly from the ISP interface from the programmer.
Ok, that’s the end result. Next: how to get there:
Prerequisites (hardware and software)
Build the circuit
Write code
Upload to microprocessor
Arduino Game of Life on 8x8 LED Matrix
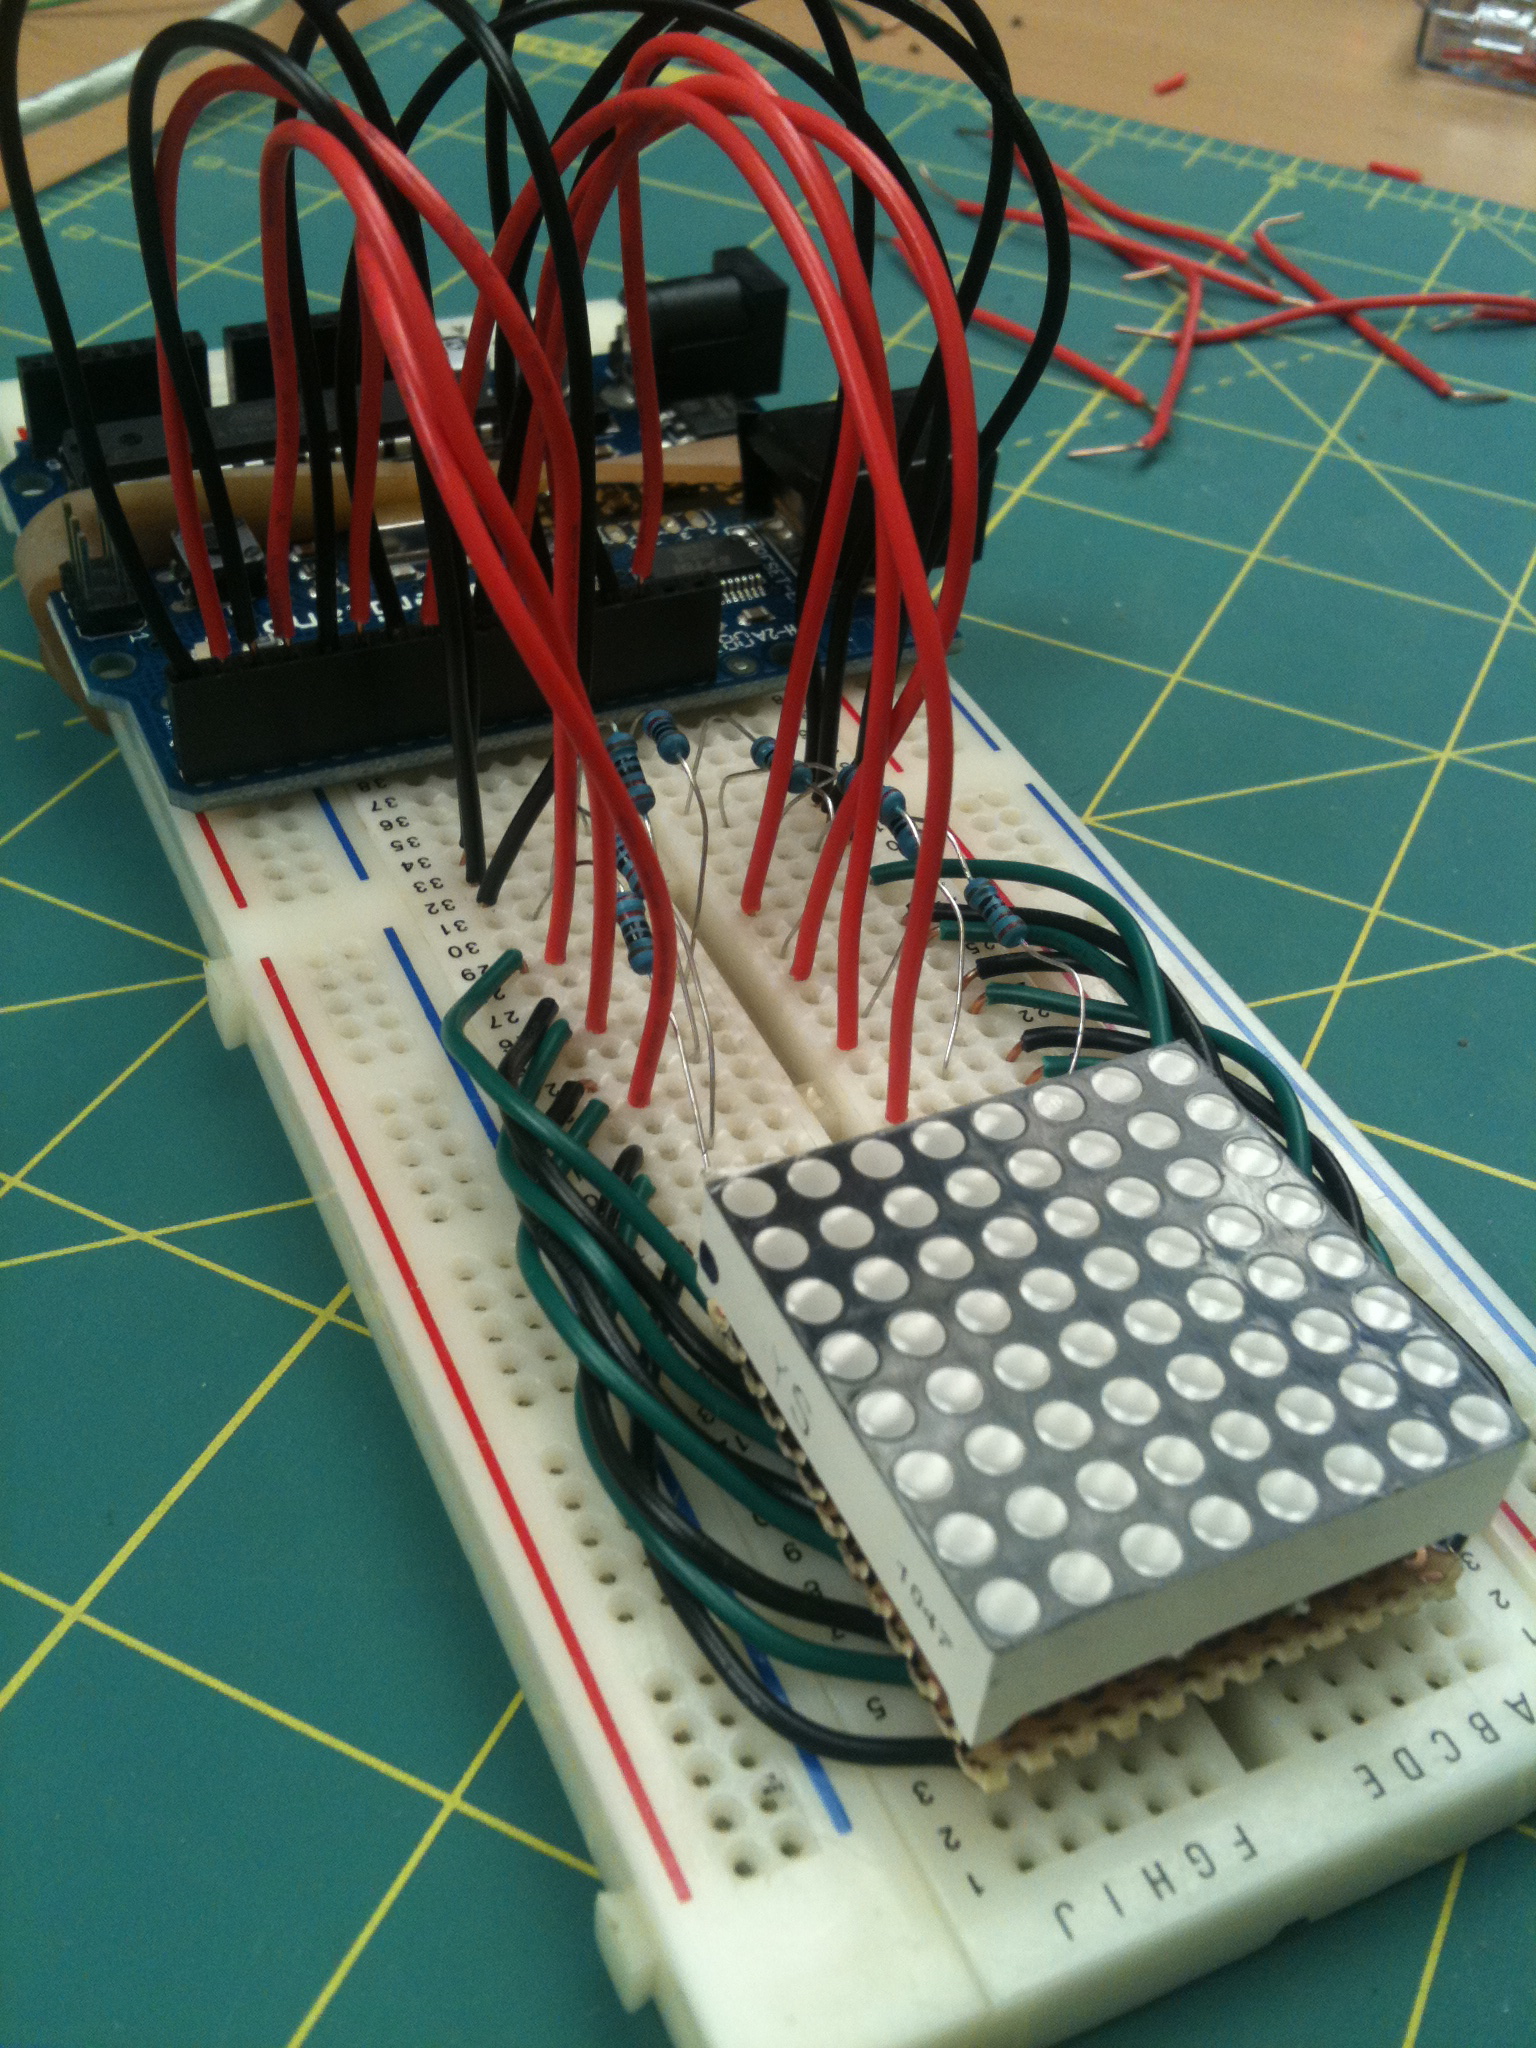
I was messing around with some Christmas toys and threw together a Conway’s Game Of Life implementation together on my Arduino. I just love how quick it is to get things up and running on this platform. It took me longer to solder a platform for the LED matrix to raise it up off the breadboard so the wires would all fit than the whole rest of the project.
Here’s a video of Arduino Game Of Life running.
Anyway, more pictures and full source code are below. The code has a couple of conditionally compiled options, one for storing rand seeds to EEPROM. With the randomization turned on, every so often I’d see a “game” that progressed really nicely. I wanted to be able to go back and watch the same game again.

How to Selectively Delete Photos Off iPhone?
To spread some knowledge I found really helpful, this thread contains the answer to the question. The iPhoto app will let you delete all downloaded images, but I wanted to delete a select range (some big videos in particular). The short version: quit iPhoto, launch Image Capture, click Download Some…, select photos to delete, and delete from the edit menu. Done. Thanks FloBro!
PHP 5.3 + XDebug + NetBeans + Mac OSX Leopard
… or how I got all the toys to play nice together …
If you’re working in PHP and are echoing out your variables to see what’s going on, please stop that right now. Graphical Debuggers are here (in fact, they’ve been here for some decades) and now they work really nicely with free IDE tools. Here I’ll outline how to get graphical PHP debugging with NetBeans working. The overview is: (1) install PHP 5.3, (2) install Xdebug, (3) install NetBeans, (4) configure publishing path, (5) test Xdebug.
There’s a lot more to go through. Click through to see all the steps…
More Natural BDD With PHPUnit
I’ve always been a little jealous of RSpec. Those Ruby kids and their natural language BDD testing and plain text stories… It always just seems more awkward any other way. Cucumber looks pretty cool but getting it to play nicely with PHP is a little over my KISS threshold today.
ATtiny13 Dice
 I wanted to learn how to get the handful of non-Arduino AVR chips I have working. I wanted to learn the basics of the C API, the development toolchain, and get a sense for what can be done with the little ATtiny microprocessors. Starting with the most limited, teeny tiny little chip (the 1k ATtiny13), I made a dice.
Ginger Beer Experiment #1
I made about a gallon of homemade ginger beer. It’s not perfect but it’s pretty damn good – if you like it spicy.
I was flicking through the Southwest Air in-flight magazine the other week and they had some cocktail recipes, so I shoved the mag in my backpack and forgot about it until last weekend, when I made a batch. I just tasted the first glass, and it’s hot as hell but pretty good. It’s gingery, lightly carbonated, not too sweet, and tastes a little too much of habanero. I’ll make it again but modify the recipe a little. Here’s what I’ll do next time: